🧰 Tools & Gear You’ll Need
- Dedicated bottle brush set with various sizes for different parts
- Nipple brush for small crevices
- Colander or drying rack
- Large pot for boiling
- Microwave-safe sterilizing bags (optional)
- Dedicated steam sterilizer (optional)
- Mild, unscented dish soap or a specialized breast pump cleaner
- Clean, lint-free cloths or paper towels
- Airtight storage containers or sealable bags
- White vinegar (for deep cleaning)
The Ultimate Silicone Breast Pump Cleaning Checklist
Disassemble Pump Parts
Immediately after each pumping session, carefully take apart all silicone components of your breast pump. This includes the breast shield, valve, and any other small parts that come into contact with breast milk.
Rinse with Cool Water
Rinse all disassembled parts under cool running water. This initial rinse helps to remove as much residual milk as possible, preventing it from drying and becoming harder to clean.
Wash with Warm, Soapy Water
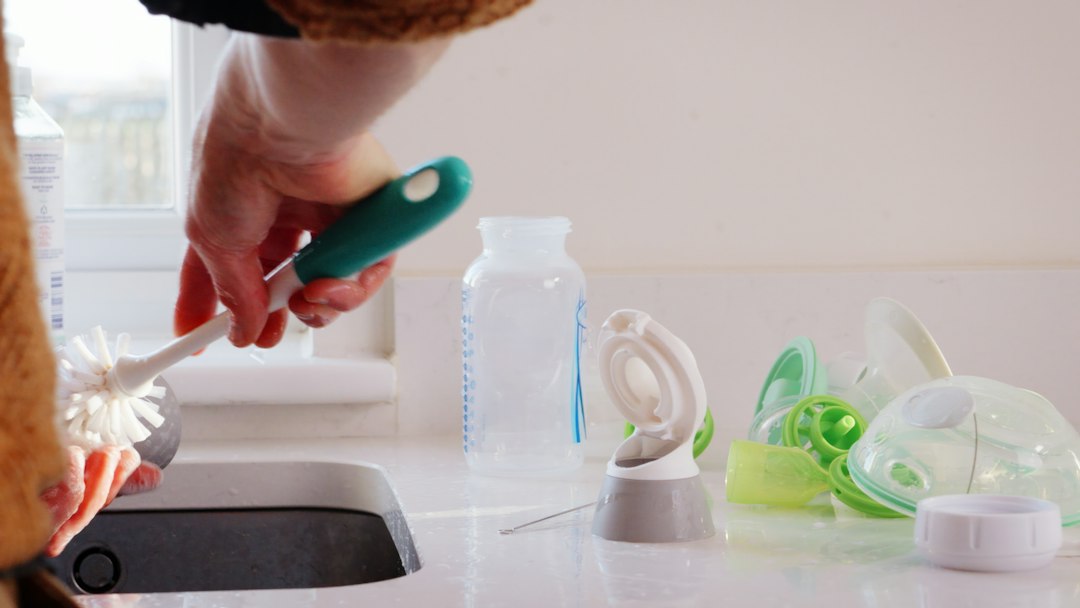
In a clean sink or basin (not the one used for general dishes, to avoid cross-contamination), wash each part thoroughly with warm water and a mild, unscented dish soap. Use your dedicated bottle brushes to scrub all surfaces, paying special attention to valves and any small nooks where milk can hide. A nipple brush is invaluable for those tiny, crucial valve openings.
Rinse Thoroughly
Rinse all parts again under clean, warm running water to remove any soap residue. Soap left behind can affect the silicone and potentially be ingested.
Air Dry Completely
Place the cleaned parts on a clean drying rack or colander in a protected area, away from potential contaminants. Ensure all parts are completely dry before storing or reassembling. Moisture is the enemy and can lead to bacterial growth or mold.

Weekly Sterilization: Methods That Truly Work
Daily cleaning removes milk residue, but sterilization is crucial for killing unseen germs and bacteria. Aim to sterilize your silicone pump parts at least once a week, or more frequently if recommended by your pump manufacturer or if your baby is under three months old, premature, or immunocompromised.
Boil Components
Fill a large pot with enough water to fully submerge all silicone parts. Bring the water to a rolling boil. Carefully add the cleaned pump parts and boil for 5 minutes. Ensure parts do not stick to the bottom of the pot, which can cause damage.
Remove and Dry
Using clean tongs, carefully remove the sterilized parts from the boiling water. Place them on a clean drying rack or a clean, lint-free cloth to air dry completely. Avoid using kitchen towels that might transfer lint or bacteria.
Deep Cleaning: Tackling Buildup and Odors
Over time, even with diligent cleaning, you might notice a slight haziness on your silicone parts or a faint, lingering odor. This is often due to mineral deposits or microscopic milk fats that regular washing doesn’t fully address. A deep clean can restore clarity and freshness.
Prepare a Vinegar Solution
Mix equal parts white vinegar and water in a clean bowl or pot. Ensure the solution is enough to cover all silicone parts.
Soak the Parts
Submerge the silicone pump parts in the vinegar-water solution. Let them soak for 15-30 minutes. The acetic acid in vinegar is excellent at breaking down mineral buildup and neutralizing odors.
Scrub and Rinse
After soaking, remove the parts and scrub them again with warm, soapy water using your brushes. Rinse them thoroughly under clean running water to eliminate any trace of vinegar scent or residue.
Sterilize and Dry
Follow your chosen weekly sterilization method (boiling, steaming, etc.) and ensure the parts are completely air-dried afterward.
Decoding Sterilization Methods: Boiling, Steaming, and Beyond
Boiling: The Classic Method for Thorough Sterilization
Boiling is the most accessible and widely recognized method for sterilizing breast pump parts. It requires minimal equipment – just a pot, water, and a heat source. The high temperature of boiling water effectively kills bacteria, viruses, and other pathogens. As detailed above, it involves immersing cleaned parts in rolling boiling water for a set duration, typically 5 minutes. Ensure all parts are fully submerged and don’t touch the sides or bottom of the pot directly to prevent melting or damage.

Steam Sterilizers: Convenience Meets Cleanliness
Electric steam sterilizers are a popular choice for busy parents. These countertop appliances use steam generated by heating water to sterilize pump parts, bottles, and other baby feeding items. They typically have a cycle time ranging from 6 to 15 minutes, followed by a cooling period. The enclosed environment ensures that parts remain sterile for up to 24 hours if the lid isn’t opened. While an upfront investment, they offer a convenient, hands-off approach to sterilization.
Microwave Sterilization Bags: Quick & Effective On-the-Go
Reusable microwave sterilization bags are a fantastic option for travel or for quick sterilizations between pumping sessions. These bags typically require adding a small amount of water, placing the cleaned pump parts inside, and microwaving for a specified time (usually 1-3 minutes, depending on microwave wattage). They are lightweight, portable, and a cost-effective alternative to electric sterilizers for occasional use. Be cautious when removing the bag, as it will be very hot.
Add Water
Pour the amount of water specified by the bag manufacturer into the bottom of the sterilization bag.
Insert Pump Parts
Place the clean, disassembled silicone breast pump parts into the bag, ensuring they are not overcrowded.
Seal and Microwave
Seal the bag securely and place it in the microwave. Heat for the recommended duration (e.g., 90 seconds for 1800W+ microwaves). Allow it to cool for a minute or two before carefully opening and removing the parts.
UV Sterilizers: The Modern Approach to Pump Hygiene
UV sterilizers are the most technologically advanced option. These units use ultraviolet light (UVC) to kill bacteria and viruses without heat or water. They are often sleek, compact, and can sterilize items quickly, sometimes in as little as 3-5 minutes. Many models also incorporate drying functions. While generally more expensive, they offer a convenient, chemical-free, and efficient way to maintain pump hygiene. Ensure the UV light reaches all surfaces of the pump parts for effective sterilization.
Essential Tools & Supplies for Pristine Breast Pump Parts
Choosing the Right Cleaning Brushes
The right brushes are non-negotiable for effective cleaning. You need a set that can reach every crevice. Standard bottle brushes are good for larger parts like the breast shield, but specialized nipple brushes are essential for the tiny valves. Look for brushes with soft, durable bristles that won’t scratch the silicone. Some sets come with multiple brush sizes, including long, thin ones perfect for reaching deep into pump tubing (though tubing often doesn’t require direct scrubbing if daily rinsing is done properly) and for the intricate details of valves and membranes. Ensure the brushes themselves are easy to clean and dry.
Recommended Cleaning Solutions & Detergents
For daily cleaning, mild, unscented dish soap is usually sufficient. The key is “mild” and “unscented.” Fragrances can be irritating and potentially harmful, and harsh detergents can degrade silicone. Some parents prefer specialized breast pump cleaning solutions, which are formulated to be gentle yet effective. If using such products, ensure they are specifically approved for use on silicone and are free from harsh chemicals. For deep cleaning, white vinegar is a highly effective, natural solution for tackling buildup and odors.
Storage Solutions: Keeping Sterilized Parts Safe
Once your pump parts are sterilized and completely dry, proper storage is vital to maintain their sterility. Use clean, airtight containers or resealable bags. If using containers, ensure they are washed and dried thoroughly before use. Avoid storing them in open air or in a cupboard where they might come into contact with dust or other contaminants. Many parents find it convenient to store sterilized parts in their diaper bag or work bag in a dedicated clean pouch for use away from home.

Troubleshooting Common Breast Pump Cleaning Issues
Dealing with Stubborn Milk Residue
If you notice persistent white or cloudy residue, it’s likely dried milk fat or mineral deposits. The first step is ensuring you’re using a good bottle brush to scrub all surfaces immediately after rinsing. If residue remains, a soak in warm, soapy water for 10-15 minutes can help loosen it. For tougher cases, the white vinegar deep cleaning method described earlier is highly effective. Ensure you’re not letting parts sit unrinsed for extended periods after pumping, as this is when residue becomes most stubborn.
Eliminating Lingering Odors from Silicone
Silicone can absorb odors over time, especially if not cleaned and dried thoroughly. The culprit is often milk fats that haven’t been fully removed. A deep clean with a white vinegar and water solution is the best remedy. Soaking for longer periods (up to an hour) might be necessary for persistent smells. Ensure complete air drying, as residual moisture can trap odors. Some parents also find that adding a small amount of baking soda to the soapy water during washing can help neutralize smells, but rinse extremely well afterward.
Preventing Mold and Mildew Growth
Mold and mildew thrive in damp, dark environments. The key to prevention is ensuring your pump parts are *completely* dry before storage and that your storage containers are clean and dry. Avoid storing damp parts in closed bags or containers. If you notice any signs of mold (often black or greenish spots), discard the affected parts immediately. It’s nearly impossible to fully sanitize mold-infested silicone, and the health risks are significant. Regular, thorough cleaning and complete drying are your best defense.
Sterilizing & Cleaning for Different Pump Brands: Key Differences
While the core principles of cleaning and sterilizing silicone pump parts remain the same across brands, there might be subtle differences in recommended procedures or part designs. Always refer to your specific pump manual for the most accurate guidance.
Medela Silicone Parts Sterilization Guide
Medela generally recommends daily washing with warm, soapy water and thorough rinsing. For sterilization, boiling for 5 minutes or using a Medela steam bag/microwave sterilizer are approved methods. They often advise against dishwasher sterilization for most of their silicone components due to potential damage from harsh detergents and high heat, though some newer parts might be dishwasher-safe on the top rack – always check your manual.
Spectra Baby Silicone Parts Sterilization Guide
Spectra Baby also emphasizes daily washing with warm, soapy water. For sterilization, they typically approve boiling for 5 minutes, using microwave steam bags, or electric steam sterilizers. Like Medela, they often caution against high-heat dishwashing for silicone valves and membranes, recommending top-rack washing if a dishwasher is used, but manual cleaning and boiling/steaming are preferred for longevity.
Lansinoh Silicone Parts Sterilization Guide
Lansinoh recommends washing all milk-contact parts daily with warm, soapy water. Sterilization can be achieved through boiling (5 minutes), using Lansinoh’s own steam bags, or other microwave/electric steam sterilizers. They highlight the importance of inspecting parts regularly for wear and tear, especially valves, which can become stretched or damaged over time.
Haakaa Silicone Parts Sterilization Guide
Haakaa, known for its one-piece silicone breast pumps, generally has simpler parts. They advise washing after each use with warm, soapy water. Sterilization is typically done by boiling for 2-3 minutes (check manual as prolonged boiling isn’t always necessary for their simpler designs) or using steam sterilization methods. Due to the singular nature of some Haakaa designs, ensuring all internal surfaces are scrubbed clean is paramount.

FAQs: Your Burning Questions About Silicone Breast Pump Hygiene Answered
How Often Should I Sterilize My Breast Pump Parts?
Health authorities and most manufacturers recommend sterilizing all milk-contact parts daily for newborns (especially premature or immunocompromised infants) and at least weekly for healthy, older babies. If you are exclusively pumping, daily sterilization might be necessary. Always consult your pump’s manual and your pediatrician for specific recommendations based on your baby’s health and age.
Can I Wash Silicone Breast Pump Parts in the Dishwasher?
This is a common question with a nuanced answer. Many manufacturers advise *against* regular dishwasher use for silicone parts, particularly valves and membranes, due to the high heat and harsh detergents potentially degrading the material over time. If you do use a dishwasher, place parts on the top rack and use a mild detergent. However, hand washing with dedicated brushes followed by boiling or steam sterilization is generally considered the safest method for preserving the integrity and lifespan of your silicone pump parts.
What’s the Best Way to Dry Pump Parts?
The best way to dry pump parts is to allow them to air dry completely on a clean drying rack or a lint-free cloth in a clean, protected area. Avoid using kitchen towels or cloths that may harbor bacteria or leave lint behind. Ensure there’s good air circulation. Never reassemble or store parts that are still damp, as moisture promotes bacterial growth.
How Long Do Sterilized Parts Stay Safe to Use?
If stored properly in a clean, enclosed environment (like a sealed container or sterilizer with the lid closed), sterilized pump parts can typically remain safe to use for up to 24 hours. This is why electric steam sterilizers are convenient – they maintain a sterile environment. If you’re storing parts outside of a sterilizer, use airtight containers or bags and always ensure they were completely dry before sealing.